I’ve wanted to make a marbled sourdough for a while but never got around to it. With a break in the hot weather, thanks to the annual monsoons, I was able to fire up the oven again and test out this method. I’m really happy with how the results came out!

Schedule
Using the lazy sourdough method is actually quite simple. The real key to this method is that you can use your unfed starter straight from the fridge without the need to make a levain. There’s also no autolyse which saves about 30 minutes.
Schedule: Here’s a link to the lazy sourdough method.
The exact schedule I used is at the bottom of this post.
Ingredients:
This recipe makes two loaves. Simply divide all the ingredients by two if you only want one loaf.
Dough #1
- 450g bread flour
- 50g rye flour
- 375g filtered water @ 88’F
- 100g unfed starter straight from fridge (100% hydration)
- 11g sea salt
Dough #2
- 450g bread flour
- 50g rye flour
- 20g cocoa powder
- 385g filtered water @ 88’F
- 100g unfed starter straight from fridge (100% hydration)
- 11g sea salt

Method:
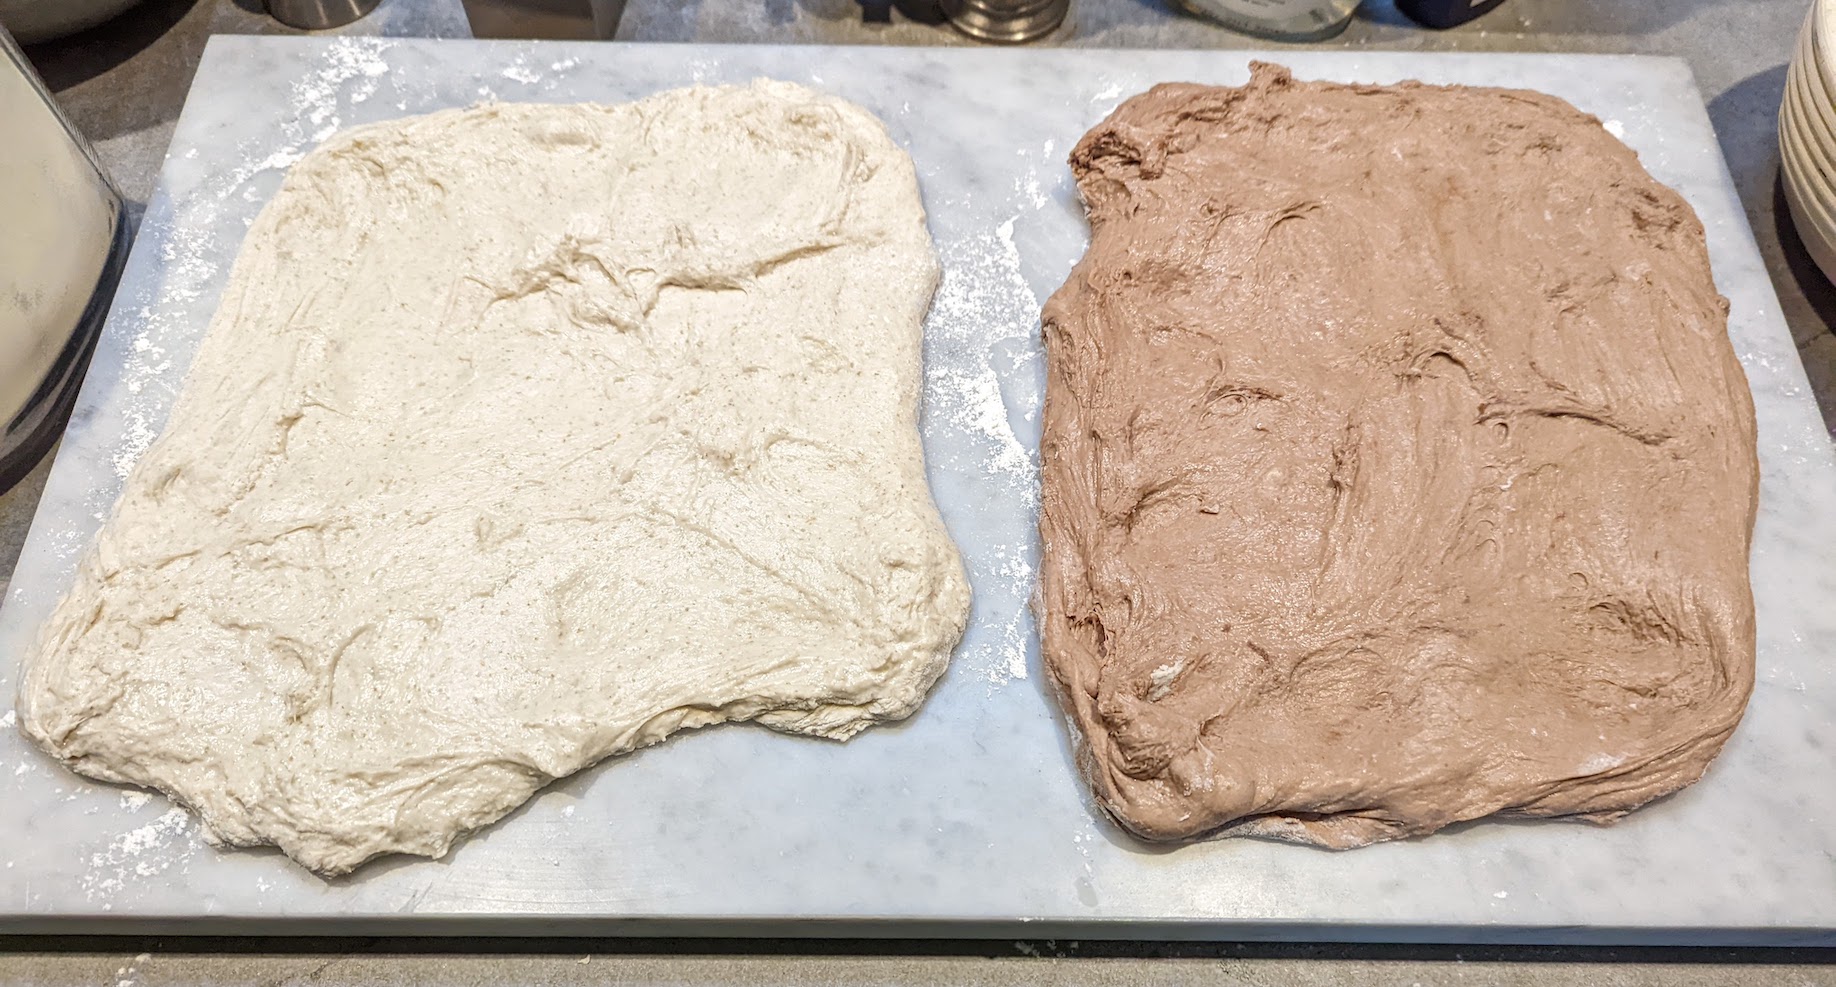
I did two separate fermentations, one with cocoa powder and one without. The cocoa powder will darken one batch to help give the marbled appearance. With each batch, I mixed all the ingredients together and performed four stretch and folds within the first two hours of fermentation and then let it sit for an additional 6 hours at room temperature.
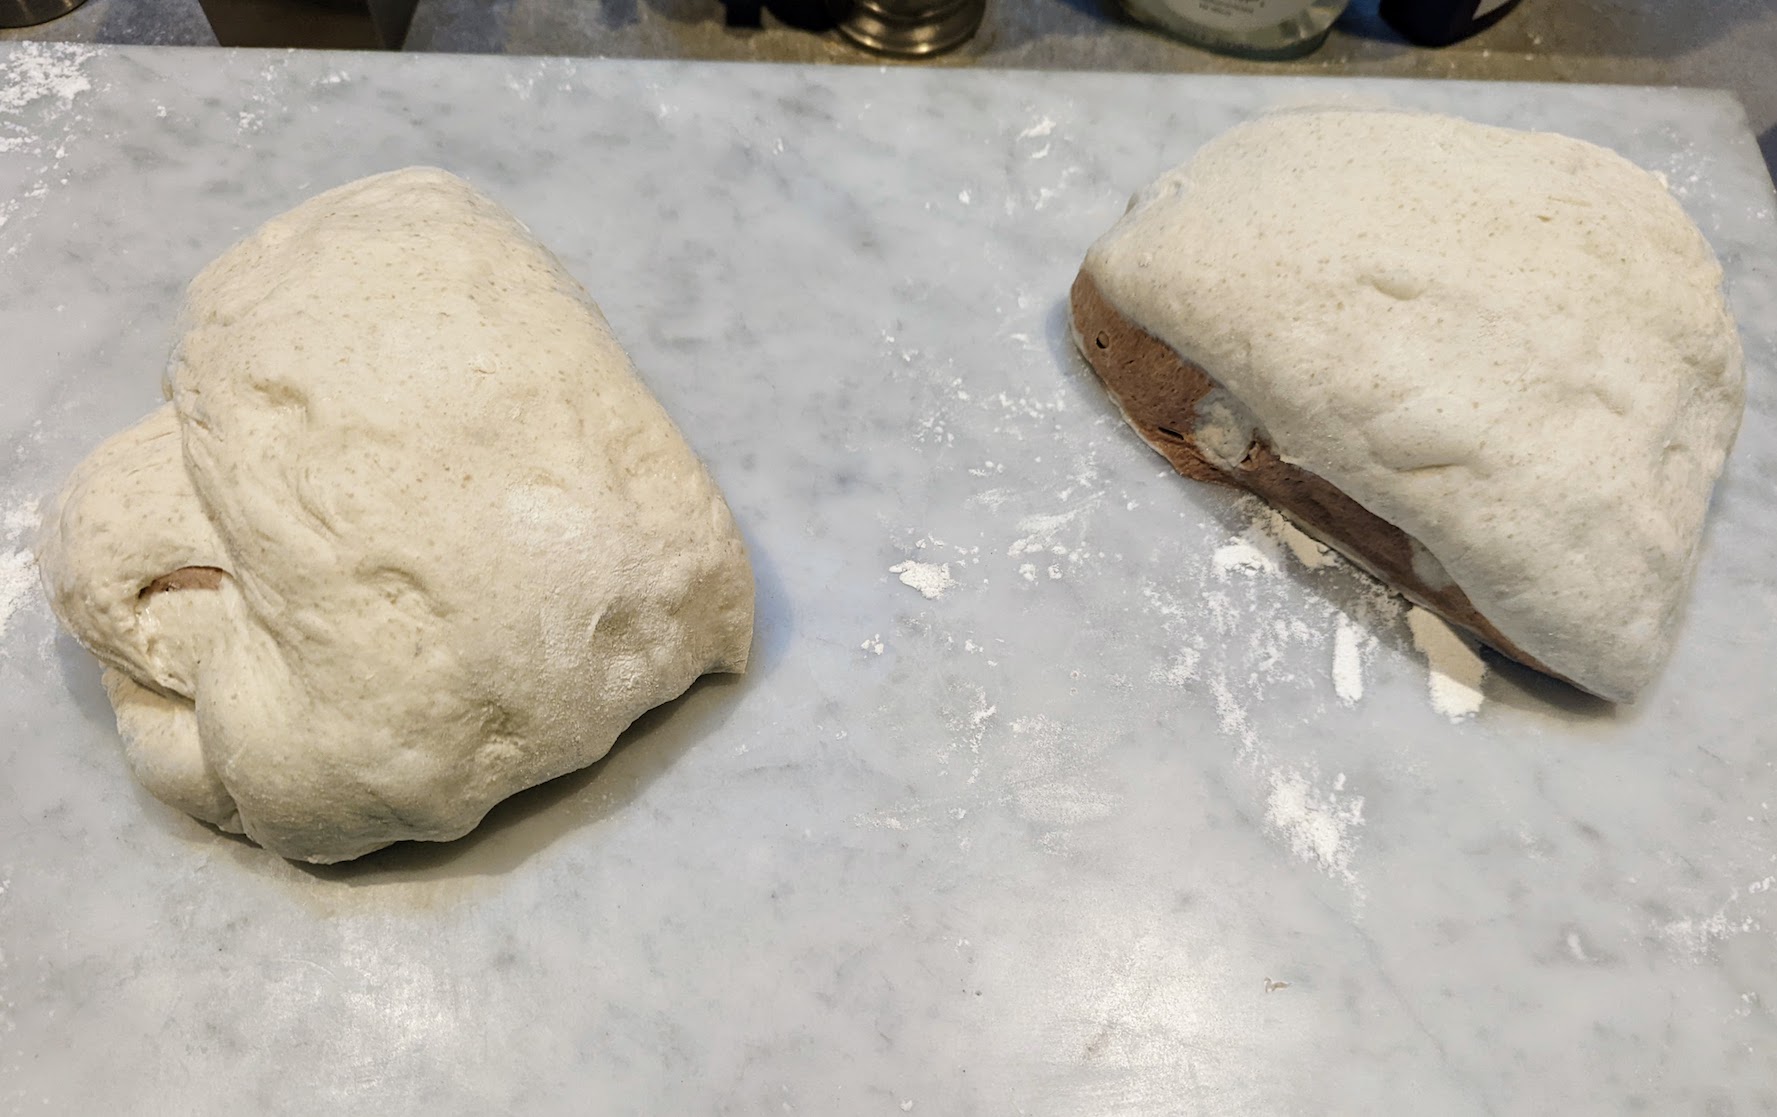
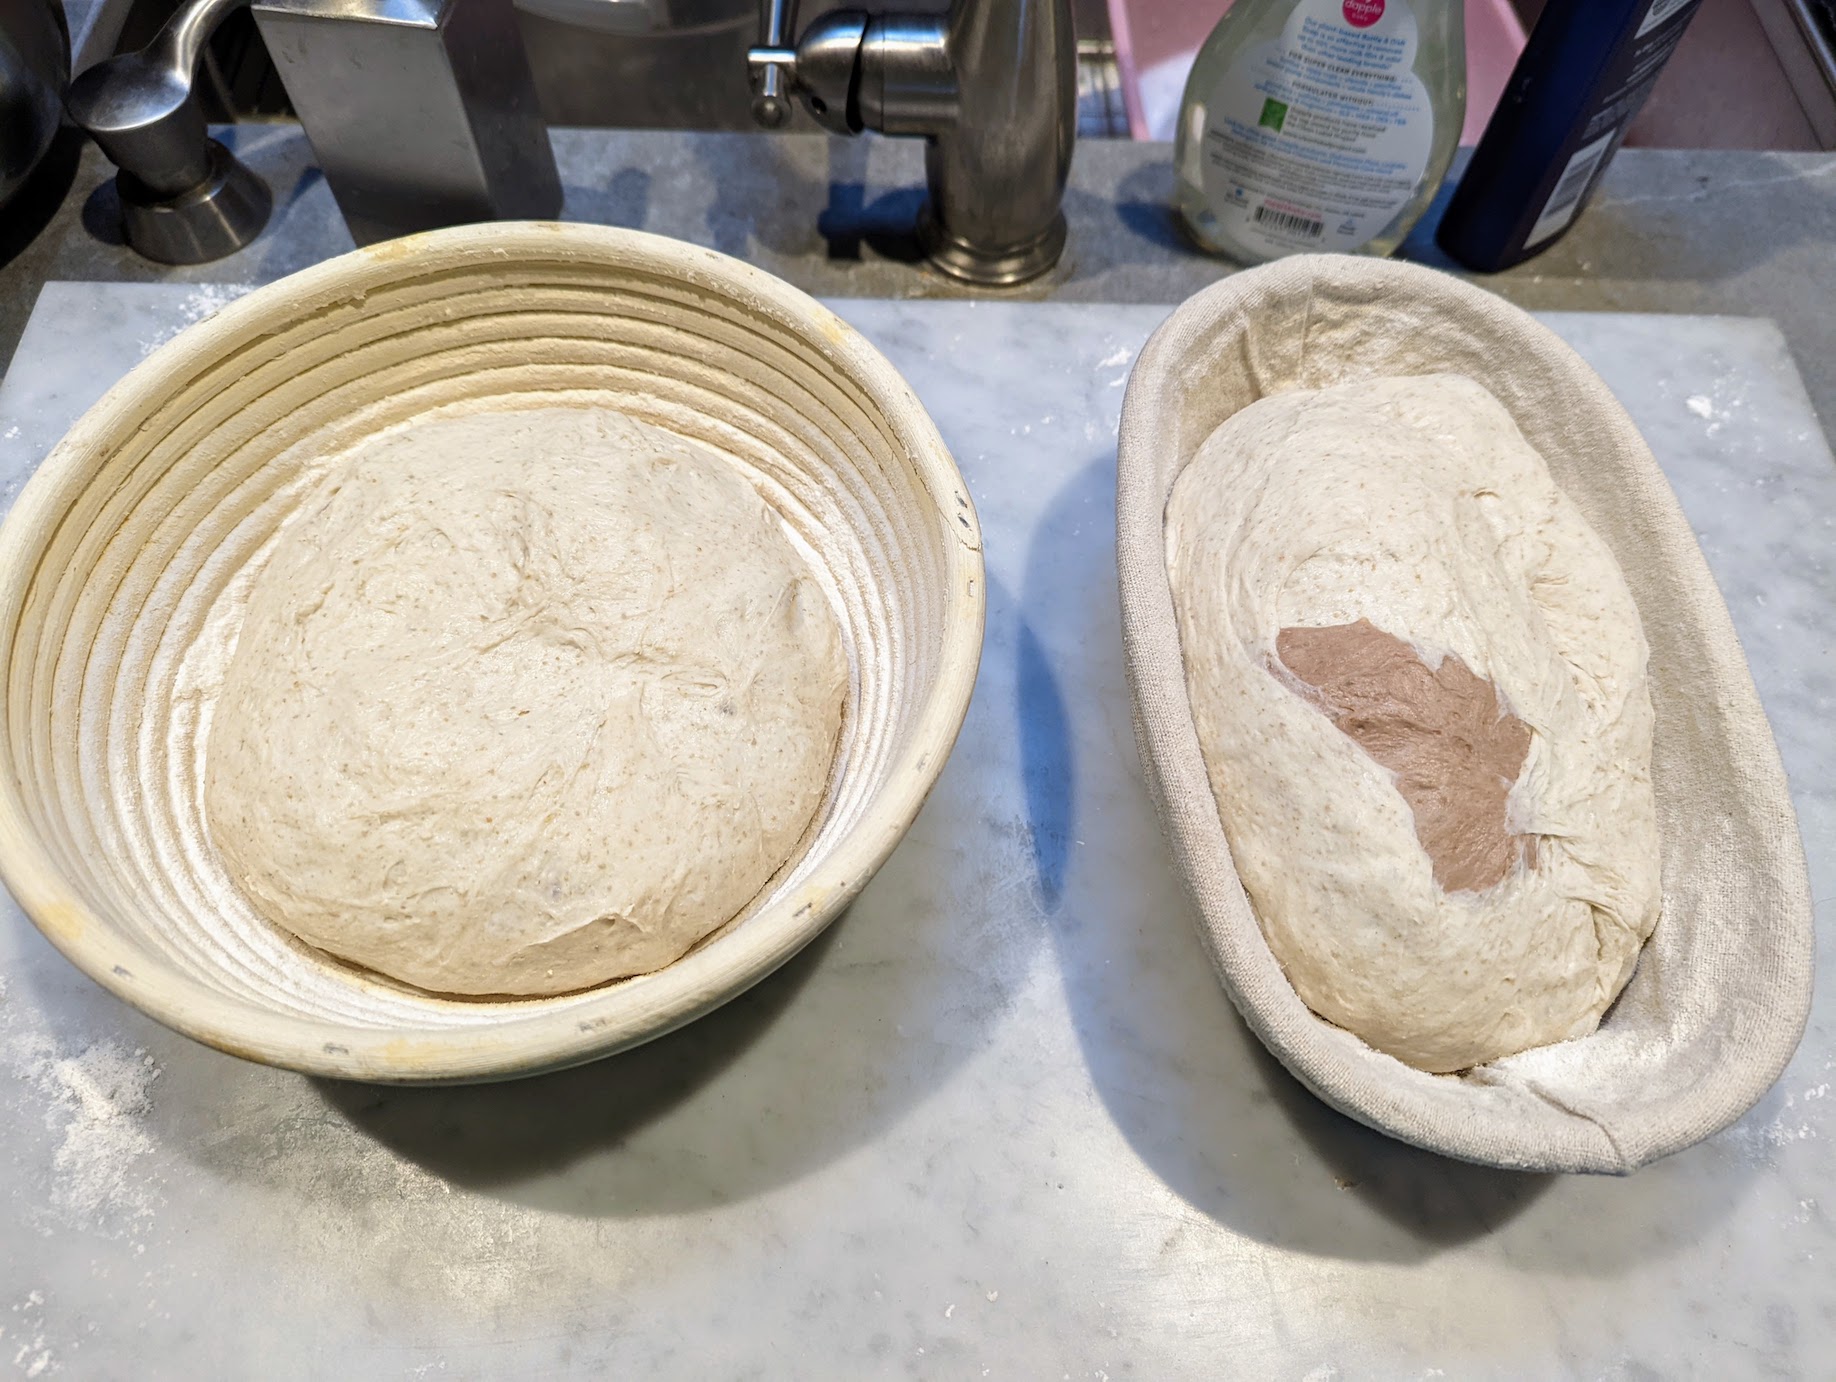
Once the dough had doubled, floured a work surface and spread each dough out into a rough rectangle. I put the dark dough on top of the light one and then folded it several times. After folding, I cut the large dough in half and shaped each piece and placed them in bannetons. I put the bannetons in vegetable bags and then placed them in the fridge for a 17 hour cold proof.


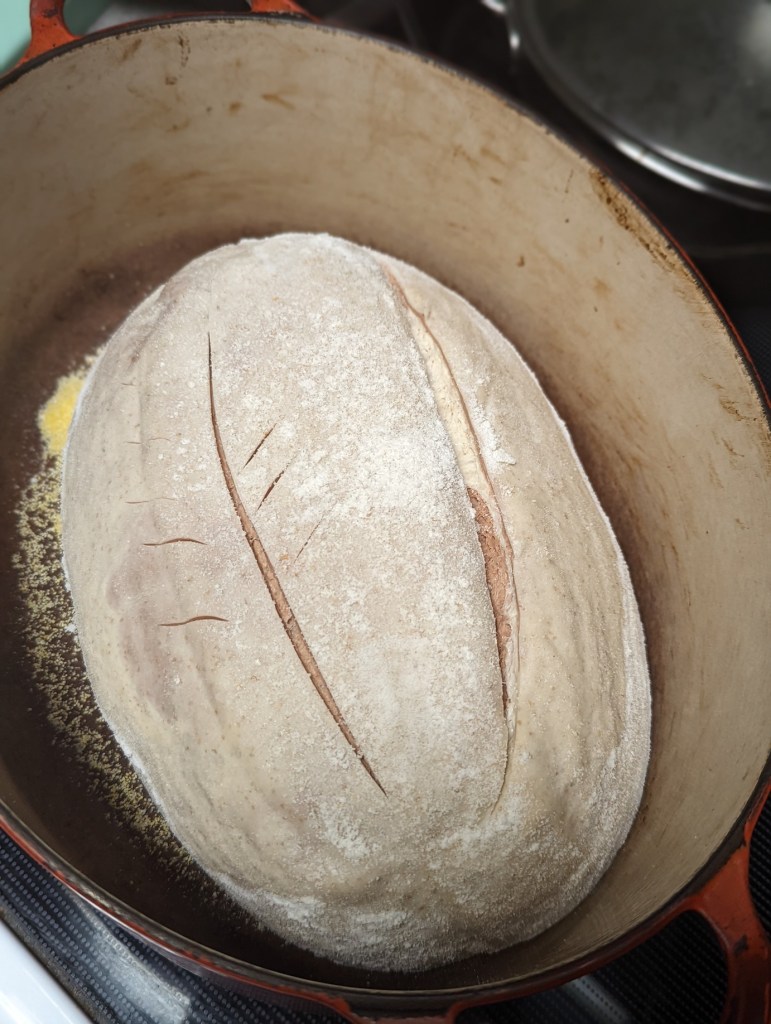
One hour before baking I started preheating the oven, with dutch ovens inside, to 450’F. When it was time to bake, I took the loaves straight from the fridge and placed them in the preheated dutch ovens, gave them a quick score and then put them in the oven. I baked the loaves at 450’F for 20 minutes covered, then removed the lid of the dutch ovens and baked for an additional 30 minutes.

Result:
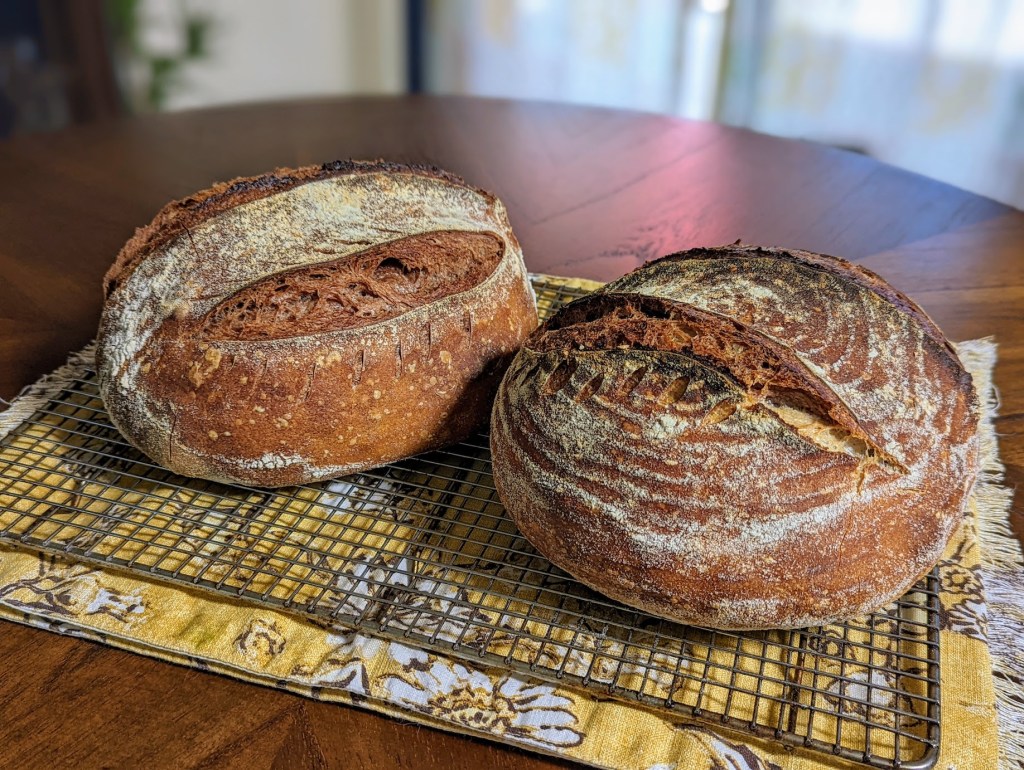
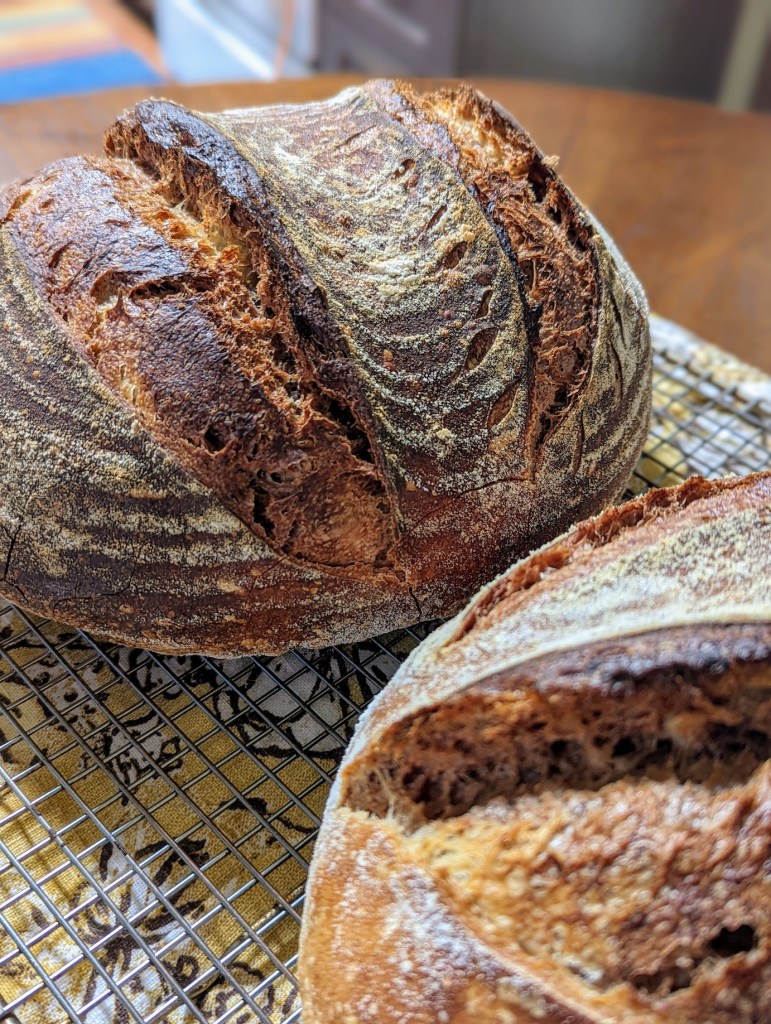
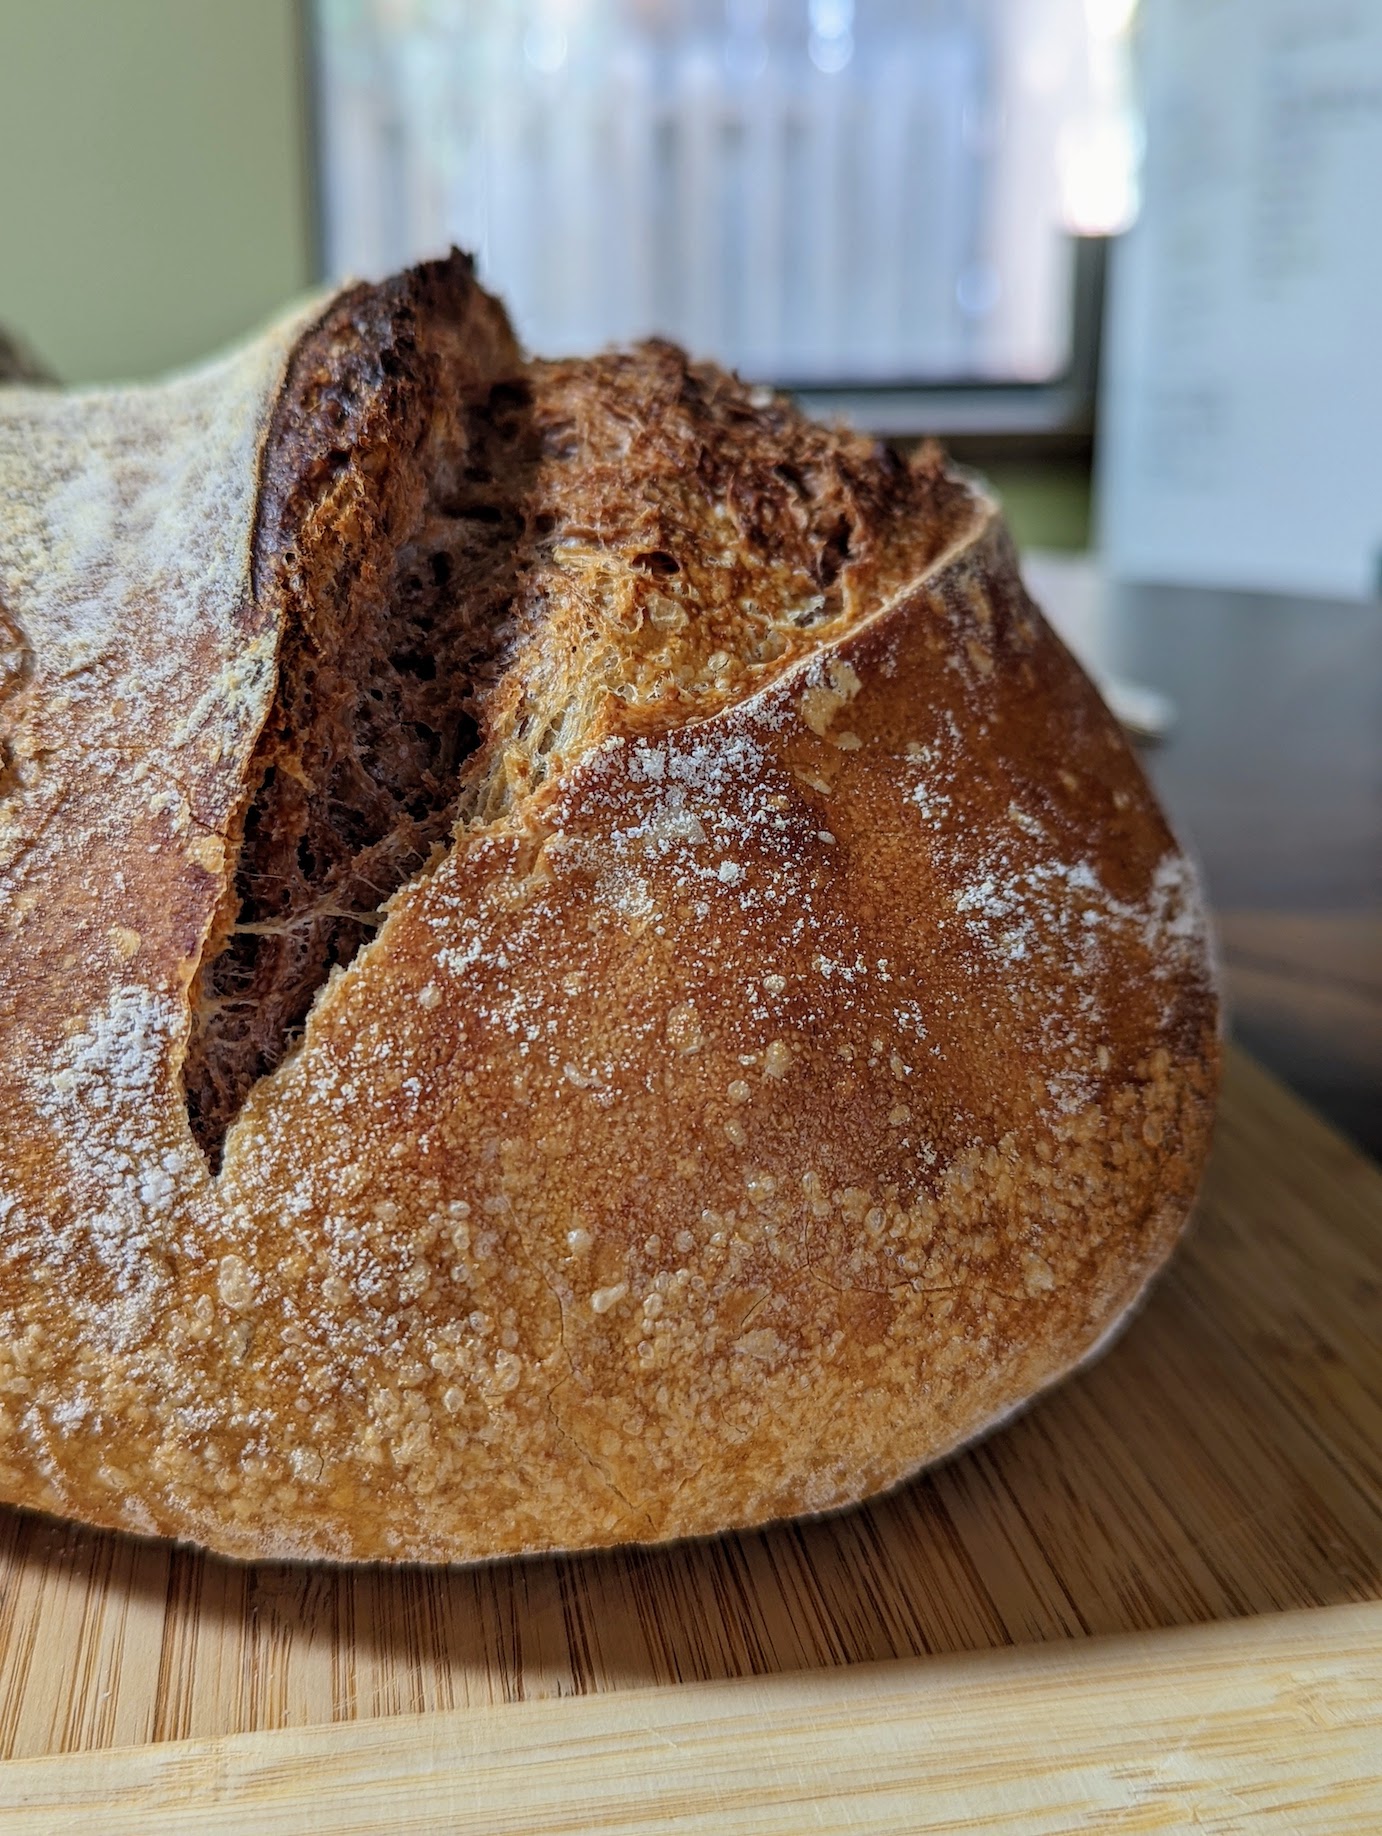
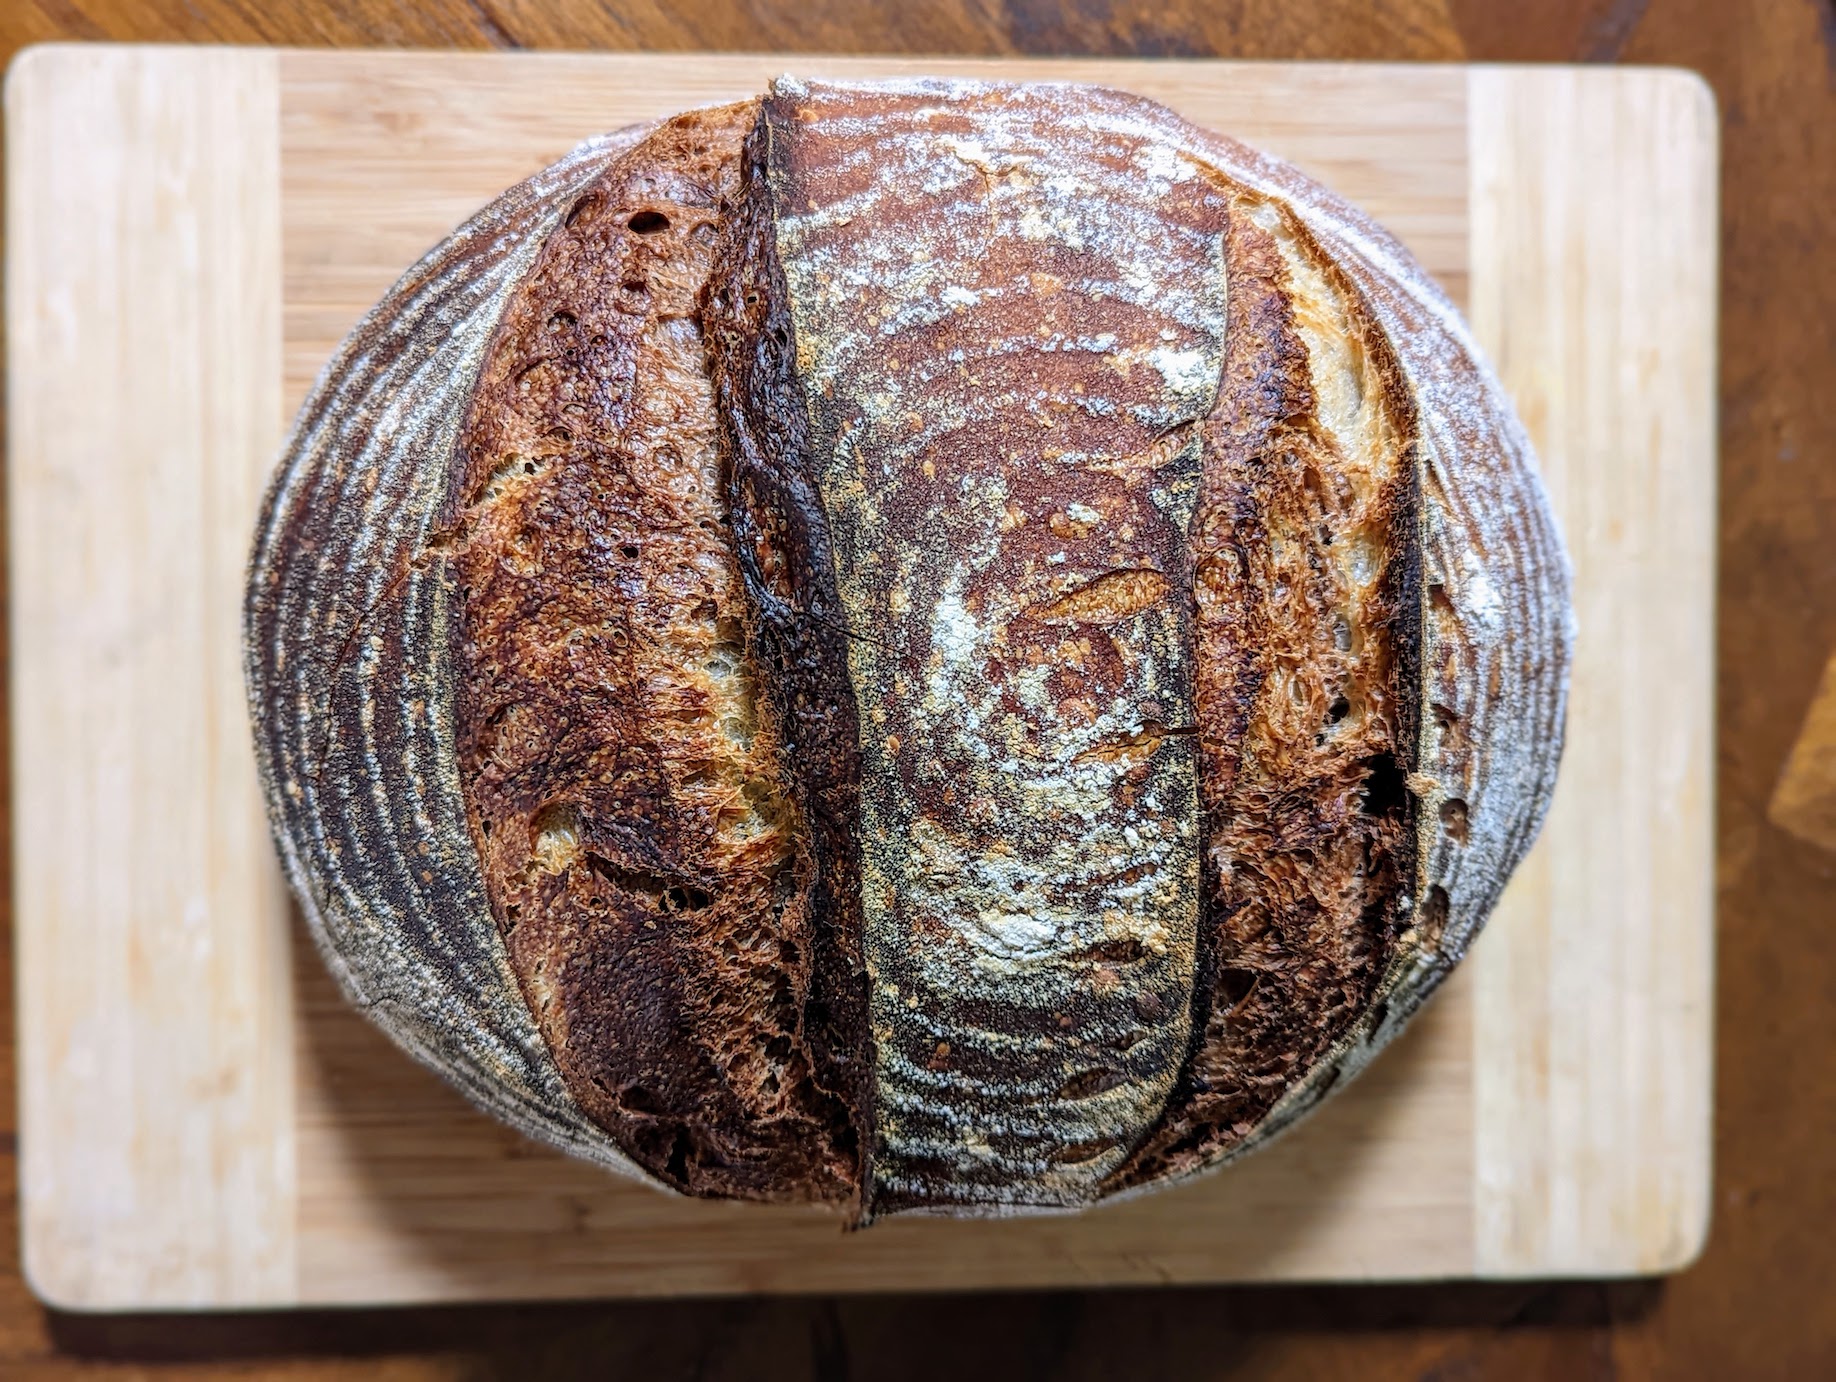
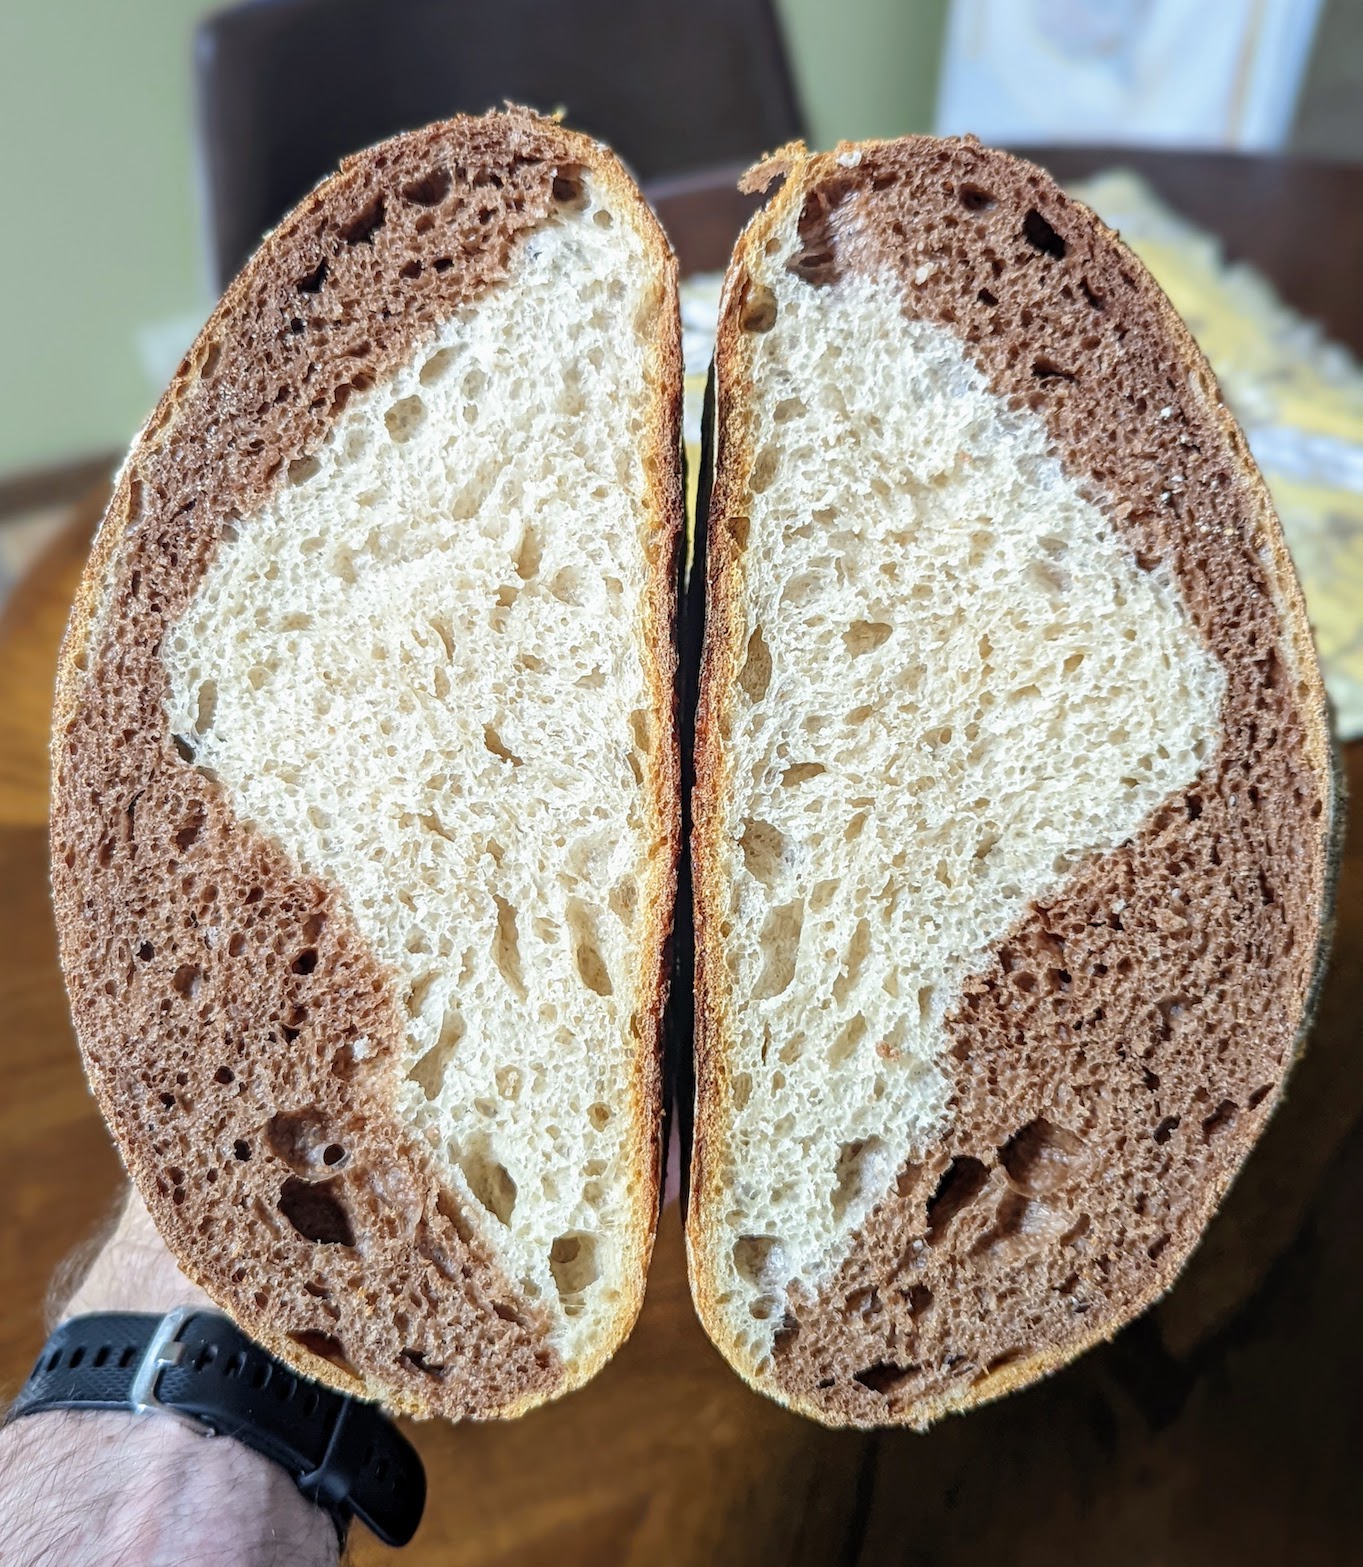
I’m really happy with how these loaves turned out. The marbling worked pretty well for my first attempt. Next time I’ll try folding it slightly differently to get a little more marbling, but overall I’m happy with how they turned out.
The crust doesn’t show the marbling on the inside, but it came out nice and brown regardless. The scoring could have been done a little different on the round loaf since it caused some strange shaping as it rose in the oven.
As far as flavor goes, you can’t tell that there’s any cocoa powder in the darker part of the bread. The loaf itself tastes great with some nice flavor coming from the sourdough starter and long proofing in the fridge.
I’ve made garlic bread and pressed sandwiches with this bread and it works great as always for those kinds of meals!


My Baking Notes
- Ambient Temperature @ mixing: 76’F
- Mixed @ 12:00pm on July 30th
- Dough was 86’F at mixing
- 4 stretch and folds in first 2 hours
- Started proof @ 7:15pm on July 30th
- Preheated oven @ 11:15am on July 31st (~17 hour cold proof)
- Out of fridge and into oven @ 12:15pm


This looks delicious- I’m definitely going to try it!
LikeLike